Re: Selective Sharpening
Very well explained Stan. To keep things simple on occasion I use a new brush in LR and use that to paint on sharpening where I want it. Quick and easy and saves flicking between LR and PS
-
Re: Selective Sharpening
Pretty much as I do it Stan.
Nicely explained for those that have yet to try it.
DaveLeave a comment:
-
Re: Selective Sharpening
cant really answer that as I never use lightroom, although any processing with Photoshop always starts off with the raw file opened in Adobe Camera Raw, which is quite similar to the lightroom interface.but it prompts a question - what advantage is there in this method over using an adjustment brush in LightRoom?
StanLeave a comment:
-
Re: Selective Sharpening
Thanks for posting this Stan, but it prompts a question - what advantage is there in this method over using an adjustment brush in LightRoom?Leave a comment:
-
Re: Selective Sharpening
Thank you Stan , it`s kind of you to take the time to share that with us . I will have a play when time allows .Leave a comment:
-
Re: Selective Sharpening
Great tips Stan. Will certainly try it . Thank you.Leave a comment:
-
Re: Selective Sharpening
I wanted to keep it simple but I would also vary the opacity of the mask in some circumstances and / or the opacity of the duplicate layer itselfI use almost the same procedure when softening skin tones by using Filter, Blur, Gaussian Blur and then using a layer mask in the way you have described. The percentage fill option on the mask is also really useful for then adjusting the level of blur I want (in my example).
In addition you can also use this process to selectively reduce noise in an image, ie apply noise reduction on a duplicate area but this time you will we wanting the effect on the background so mask out the subject instead
StanLeave a comment:
-
Re: Selective Sharpening
Nice one. It's a very similar process in Affinity.Leave a comment:
-
Re: Selective Sharpening
It's always good to see others workflows, cheers.Leave a comment:
-
Re: Selective Sharpening
Good post Stan; very clear and informative. I use almost the same procedure when softening skin tones by using Filter, Blur, Gaussian Blur and then using a layer mask in the way you have described. The percentage fill option on the mask is also really useful for then adjusting the level of blur I want (in my example).Leave a comment:
-
Selective Sharpening
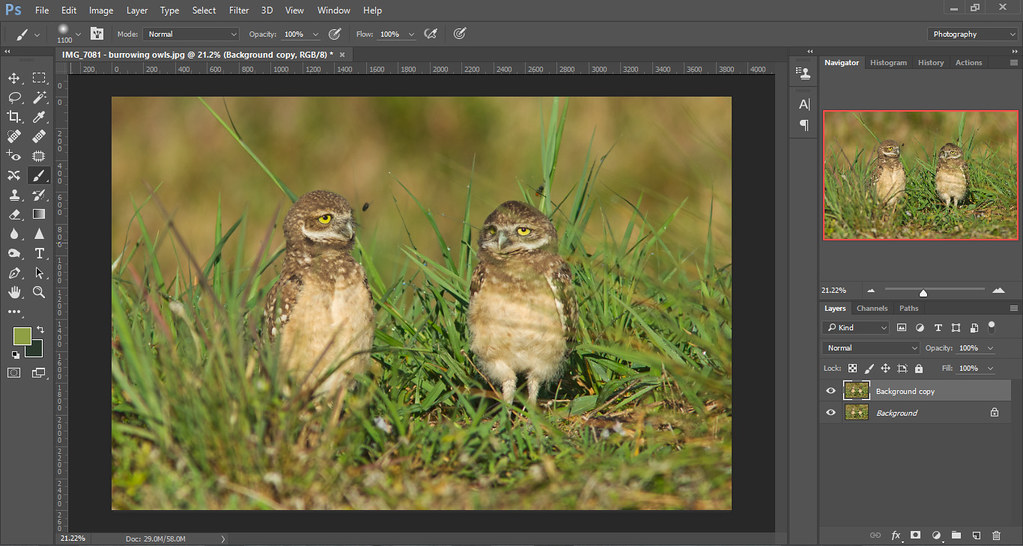
This is for Mark and any others who may be interested. When sharpening, particularly wildlife shots, it always looks better just to sharpen your subject rather than the whole frame. There are a number of ways to do it, the simplest is just to make a selection of the subject and apply unsharp mask to that area only. My preference is to use layers and masks which takes a little longer but is easier if you have more than one subject in the frame.
This is one of my burrowing owl images where I need to sharpen just the two owls. For the tutorial I have oversharpened the subjects just so they show up better against the unsharpened background
Sharpening should always be the very last stage in post processing, so having opened the image in photoshop and cropped, adjusted the levels etc and flattened the image, duplicate the background layer - "layer, duplicate layer"
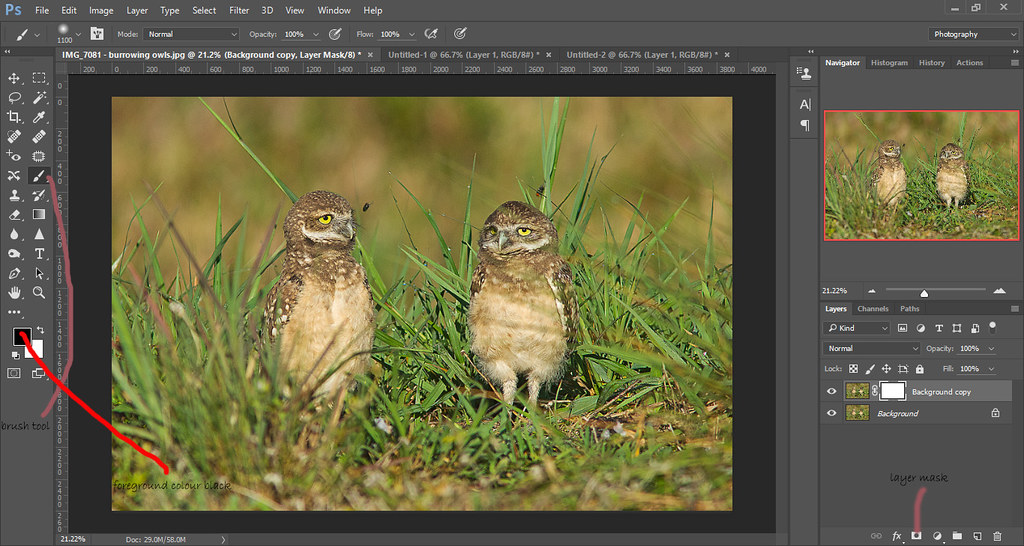
Apply unsharp mask - "filter, sharpen, unsharp mask" and vary the amount, radius and threshold to suit. At this stage the whole image is sharpened

Now we apply a layer mask and paint over the areas we dont wish to sharpren - choose a soft edged brush around 4/500 pixels depending on the size of the image, press "D" on the keyboard to set foreground / background colours to black and white - pressing "X" on the keyboard will toggle from black to white and back again
Now paint over the areas you do no wish to sharpen - pressing " \ " on the keyboard will highlight those areas
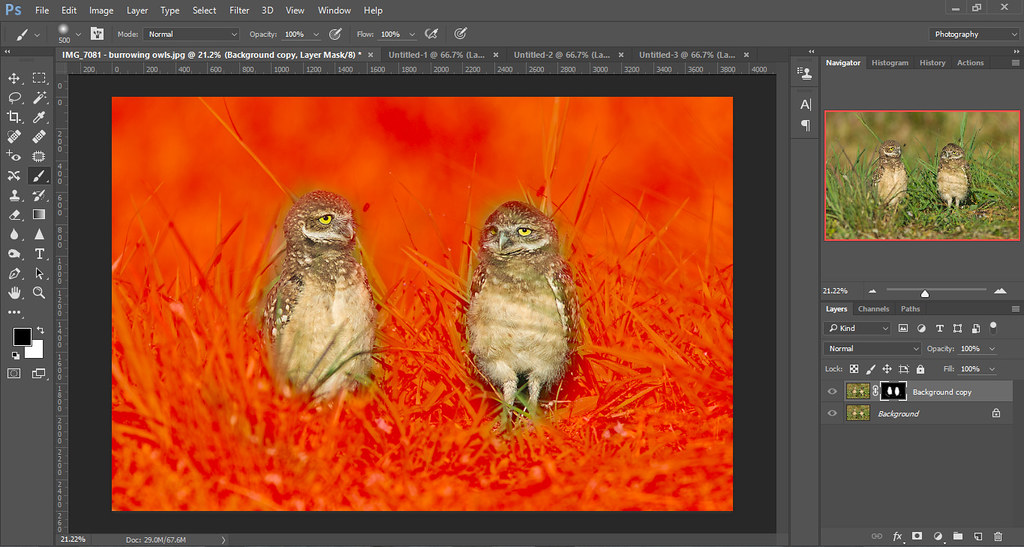
If you make a mistake, press " X " on the keyboard to change the foreground colour from black to white and paint over the area you dont wish to mask
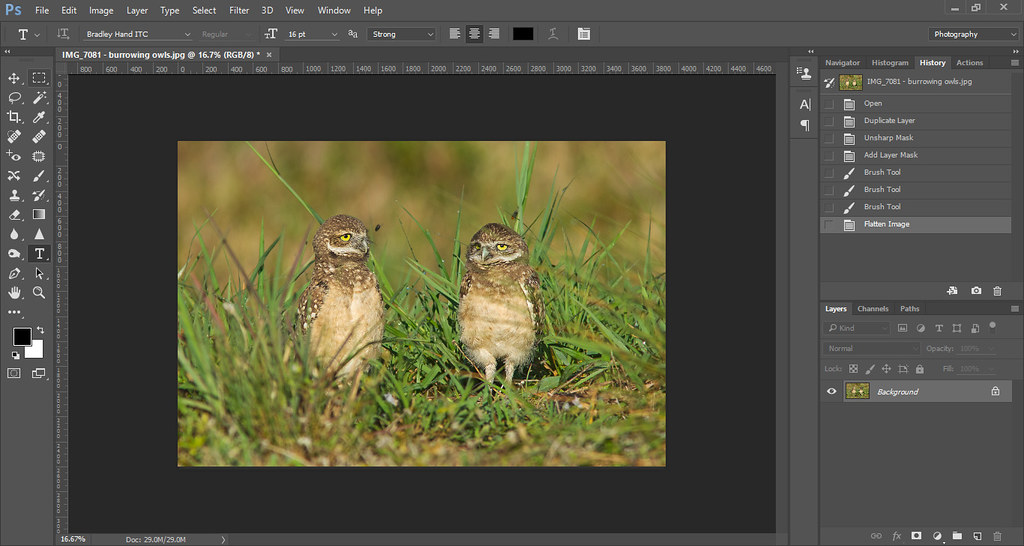
Press " \ " again to remove the highlight and when satisfied flatten and save the image
Leave a comment: